
Okay, part II of the apple core table runner tutorial!
Okay, Teil II des Apple Core Tutorials!
1. For the center you'll need 18 ACs. Lay them out in a 3 x 6 grid until you're pleased with the arrangement
1. Für die Mitte braucht man 18 ACs, die man in einer 3 x 6 Anordnung auslegt, bis einem die Verteilung der Stoffe gefällt.

2. See the notches? They tell you where you'll have to match up the fabrics. To sew together two ACs align the edges of the concave curve right side up and the convex curve of the other AC wrong side up on top and begin sewing with a 1/4" seam allowance.
2. Seht Ihr die Kerben? Sie zeigen, an welchen die Stoffe aufeinander treffen müssen. Um 2 ACs zusammenzunähen, legt die konkave Rundung mit der rechten Seite nach oben und die konvexe Kurve darauf, mit der linken Seite oben. Näht langsam mit einer 1/4" Nahtzugabe.

3. NO NEED TO PIN!!! Really, you don't need to! Just guide your fabric between your fingers while you sew. Only align the next couple of centimetres.
3. IHR BRAUCHT KEINE STECKNADELN!!! Wirklich, braucht man gar nicht! Führe den Stoff zwischen Deinen Fingern während des Nähens und lege jeweils nur ein paar Zentimeter im Voraus übereinander.

4. The more you sew, the bulkier gets the sewn piece. No problem, it has to be.
4. Je weiter man näht, desto wurstiger wird das bereits genähte Stück. Kein Problem, das muss so :).

5. Align the notches.
5. Die Kerben müssen aufeinander treffen.

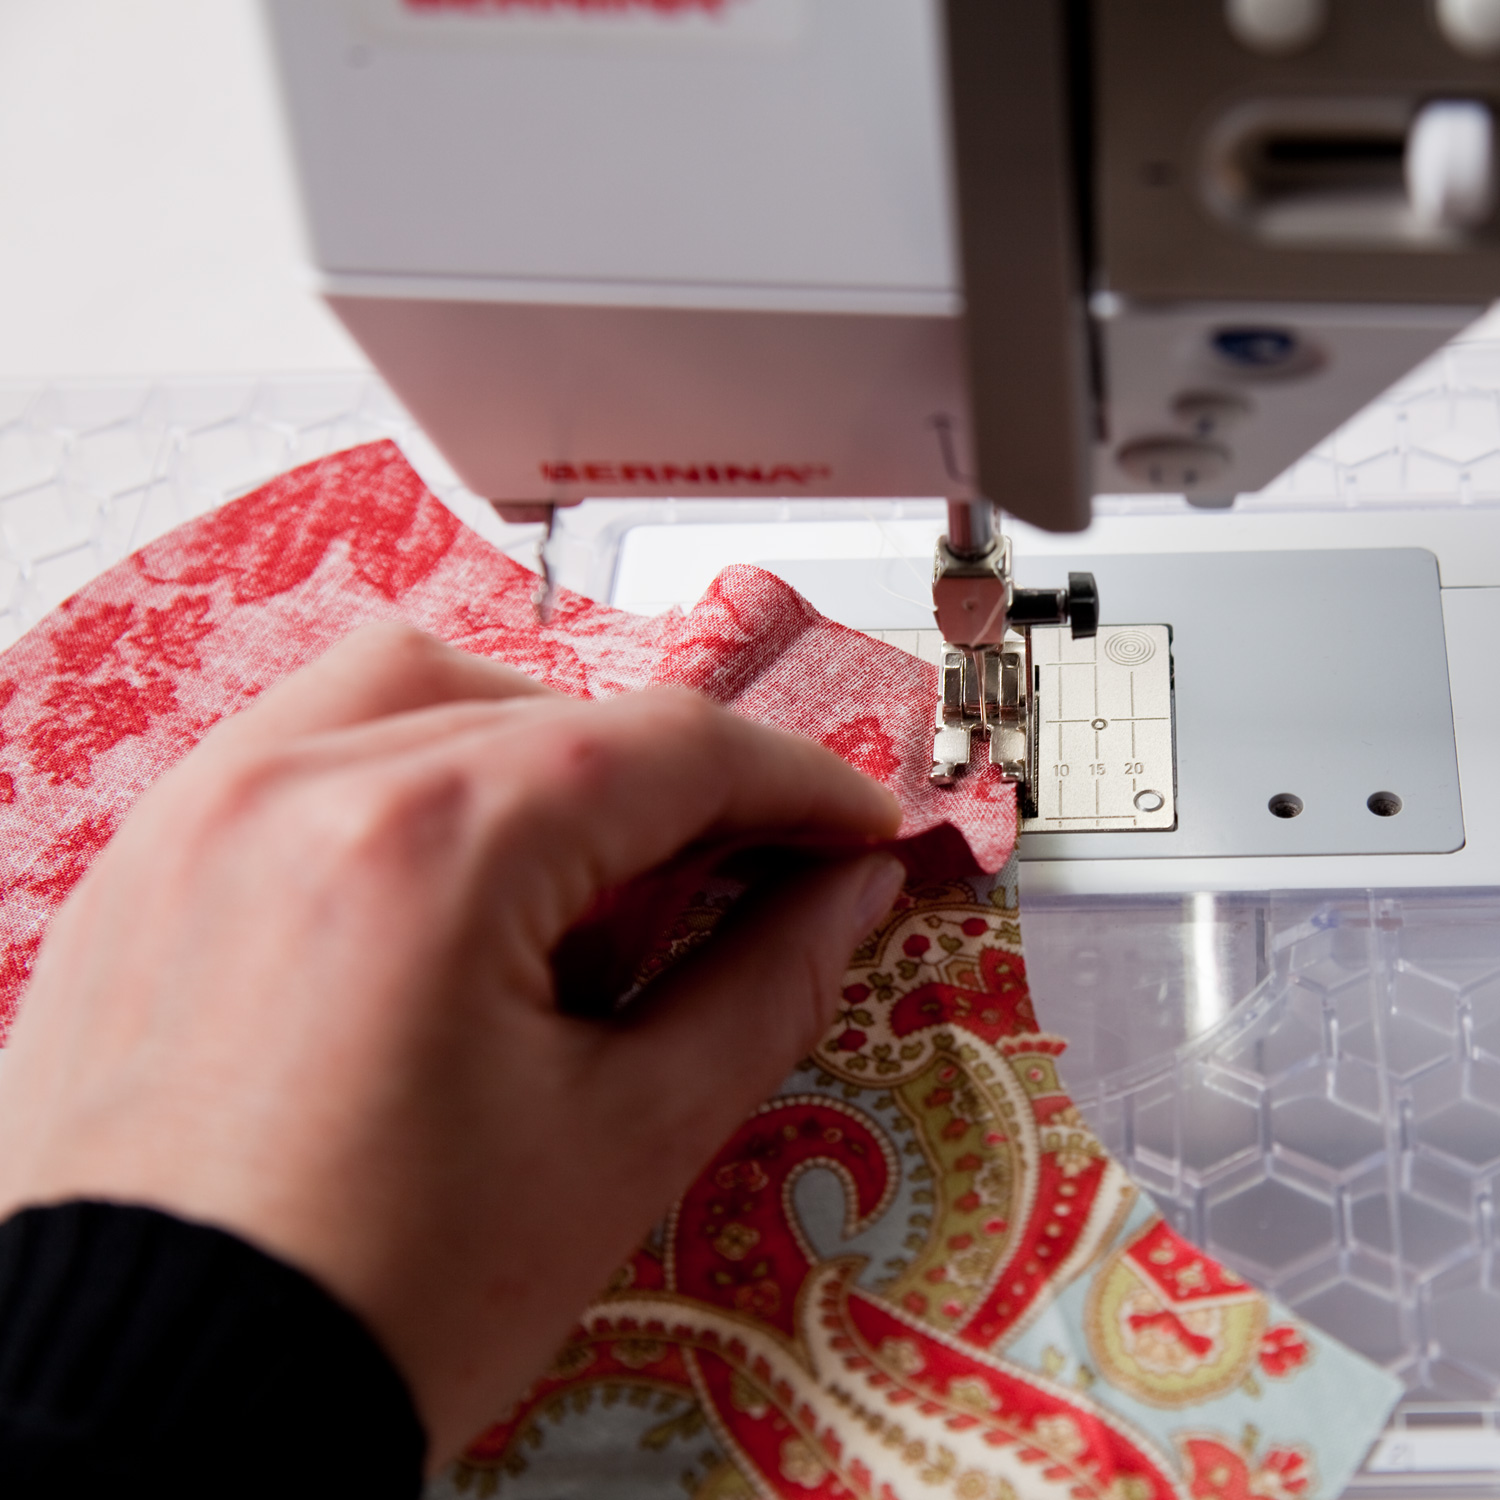
6. Guide your ACs right to the needle, here the stiletto is quite helpful!
6. Führe die ACs direkt bis zur Nadel, hierbei hilft ein Stiletto ungemein!

7. Repeat.
7. Das Ganze wiederholen.

8. Press toward the concave curve.
8. Die Nahtzugabe wird zur konkaven Seite hin gebügelt.

9. Because the seam allowances were pressed toward the concave curve, they nest perfectly. Again, no need to pin, just align the intersection. Of course, now it's impossible that only one curve is on the bottom!
9. Da die NZG nur in Richtung der konkaven Rundung gebügelt wurde, passen sie perfekt aufeinander. Und wieder gilt: Keine Stecknadeln notwendig, passt nur auf dass die Kreuzungspunkte sich auch treffen. Natürlich kann man jetzt die konkav-konvex-Reihenfolge nicht einhalten!

10. Rip out a few stitches in the seam allowance in order to swirl the seam allowance.
10. Trenne ein paar Stiche innerhalb der NZG auf um diese aufzufächern.

Ta-daaa!

11. Make a row 3 ACs out of a chosen background fabric and sew on one of the short sides.

Align your ruler at the middle notches and cut lengthwise.
Attach the other half to the other side!
You'll need to rip one of the half ACs from this piece and attach another half, because of the orientation of the curves...

11. Nähe eine Reihe von 6 AC aus einem Hintergrundstoff und füge sie an eine der langen Seiten.

Richte das Lineal an den Mittel-Kerben aus und schneide sie in der Mitte durch.
Nähe die abgeschnittene Hälfte an die andere Seite!
Man muss einen der Halb-ACs abtrennen und auf der anderen Seite einen weiteren drannähen, damit es passt...

12. Repeat with the short sides!
12. Das Ganze wird an den kurzen Seiten wiederholt!

The top is finished, but still looks quite boring...but it won't stay that way - so I hope to post the 3rd part of this tutorial soon :).
Das Top ist soweit fertig, aber sieht noch recht langweilig aus...aber das soll nicht so bleiben - ich hoffe, der 3. Teil des Tutorials kann bald gepostet werden :).
Wahnsinn! Das sieht erstmal total schwierig aus, aber Du meisterst das mit Leichtigkeit! Dagegen sind ja Kreise ein Klacks...;)
ReplyDeleteIch finde dieses Muster auch immer wieder schön. Ich kenne es auch als Handnäh Arbeit.
ReplyDeleteLG
Angelika
NEID! Ich will auch so ein Wunderding der Technik!
ReplyDeleteDas Top allein sieht überhaupt nicht langweilig aus! Tolle Stoffkombination.
Bin schon auf Teil 3 gespannt!
Wow..... that looks so easy when you do it.... am afraid I would muddle it. Love the prints and colors you chose for this demo. Thanks for sharing.
ReplyDeleteIt looks wonderful!
ReplyDeletePerfekt erklärt!
ReplyDeleteI tried. Looks like apple chips. I should have used quarter inch guide foot!
ReplyDelete